WHAT WILL I NEED?
WHAT WILL WE DO?
One scene will monitor the light switch and toggle the value of the global variable each time it is switched.
The other scene will run continuously and monitor the value of the light sensor and the dimmer module. If the global variable is turned on, then it will increase or decrease the value of the dimmer to try and maintain a constant level of light in the room.
LET’S GO!
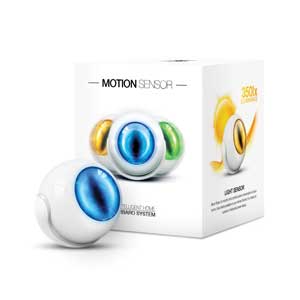
- A Motion Sensor
- A Temperature Sensor
- A Light Sensor
We are interested in the 3rd device.
By default, the level of light in a room will need to change by 200lux in order for the sensor to report it to the Home Center 2. We want to decrease this value so that the changes in light will be detected more precisely. However, keep in mind that the lower this value, the more often the device will want to send changes - the more often it wants to send changes, the more often it has to turn on its radio - the more often the radio is turned on, the quicker it will run out of batteries. For this tutorial, we will change it to a value of 20lux, but this value may not suit your purposes - adjust it accordingly.
Changing the reporting level
To modify the lux level change threshold, follow these steps:
- Click Devices in the main menu.

- Scroll down to locate the Motion sensor device you wish to modify.
- Click the spanner icon located in the top right corner of the device, to enter the device’s configuration page.
- Click the Advanced tab.
- Scroll down three quarters of the page until you can see Parameter 40.
- Click on the white number (200 by default) at the right of the parameter’s slider and change it to 20.
- Click on the Save button

- The motion sensor is a sleeping node, so it needs to be woken up to receive configuration changes.
Wake up your motion sensor by tripple-clicking the button located inside it’s shell.
Now your motion sensor will report changes in the light level of the room as small as 20lux.
Enable sceneActivation
We also need to modify the parameters of our dimmer module to enable sceneActivation.
By default sceneActivation is turned off, but this feature allows us to detect when the switch on the device is clicked. We will use this to monitor when the light is manually turned off (so that it doesn’t automatically light the room at night!).
To enable sceneActivation, follow these steps:
- Click Devices in the main menu.
- Scroll down to locate the dimmer device you wish to modify.
- Click the spanner icon located in the top right corner of the device, to enter the device’s configuration page.
- Click the Advanced tab.
- Scroll down to the very bottom of the page - you will see Parameter 41.
- Click on activation of the functionality to enable sceneActivation.
- Click on the Save button
The dimmer is a listening node, so there is no need to wake it up - it won’t be asleep.
Now your dimmer will report clicks (and double and tripple clicks) to the scene engine for triggering scenes.
Create the global variable
The global variable will monitor the state of the lights in the room - are they on or off?
If you are going to control more than one room, you will need to create one global variable for each room. The name of the global variable should match the name of the room. In this tutorial we are going to control the level of light in the Fibaro UK office, so we will call the global variable OfficeLights.
- Click on the Panels button on the main menu

- Click on Variables Panel on the left menu
- Under the variables section of this page, click the Add button.
- Under Variable Name, type OfficeLights
- Click the Save button
Your global variable will now have been created and have a default value of 0.
Create your scenes - part 1
We will now create the scene in Lua to monitor the switch on the dimmer and toggle the global variable we created to reflect the required state of the lights. This is important because otherwise, when we create a scene to change the value of the dimmer based on the light level, the scene will override our desire to turn off the lights - at night the lights would always be on full!
- Click on the Scenes button in the main menu

- Click Add Scene on the left menu.
- Give your new scene a name (switch monitor, for example) and assign it to a room.
- Click on the Advanced tab.
- Click the Save button located under Add scene in Lua.
- Copy the following code into your scene replacing the comment block that is automatically created:
--[[
%% properties
328 sceneActivation
%% globals
--]]
--[[
 Light switch state monitor
 This scene has been created by and is copyright (c) 2014, Fibaro UK Ltd
 http://www.FibaroUK.co.uk/
 You may use this scene for personal or commercial purposes however
 please respect our intellectual property and leave this comment block intact
 and unmodified.
]]
-- VERSION 1.0
-- change log at bottom of scene
--[[
  This scene uses a global variable to monitor the status of a switch. You must
  create the global variable in panels->variables in order to use this scene.
  By default the global variable should be called 'OfficeLights' but this
  can be changed if this scene is used in a different location and MUST be
  changed if the scene is duplicated for use in different rooms.
]]
-- Change this value to meet your requirements
local lampID = 328 -- the device ID of the dimmer to be monitored
                   -- don't forget to change the number in the triggers
                   -- section at the top too!
-- get the value of the global variable and the dimmer switch's sceneActivation
local ol = fibaro:getGlobalValue('OfficeLights')
local sa = fibaro:getValue(lampID, 'sceneActivation')
if (sa == '16') then          -- if the switch is clicked once...
  if (ol == '1') then                     -- if the global variable is 1
    fibaro:setGlobal('OfficeLights', '0') --   make it 0
  else                                    -- otherwise
    fibaro:setGlobal('OfficeLights', '1') --   make it 1
  end
end
--[[
Change log
1.0
- Initial release
]]
- Modify the local variable (on line 35) to be the device ID of your dimmer.
- Modify the trigger ID (on line 3) to be the device ID of your dimmer.
- Click the save button on the right of the page
This scene will begin to work immediately. Its only job is to change the value of the global variable when the switch is clicked. If it is 1, make it 0. If it is 0, make it 1.
Create your scenes - part 2
We will now create a scene in Lua to monitor the level of light and increase or decrease the value of the dimmer as required.
- Click on the Scenes button in the main menu
- Click Add Scene on the left menu.
- Give your new scene a name and assign it to a room.
- Click on the Advanced tab.
- Click the Save button located under Add scene in Lua.
- Copy the following code into your scene replacing the comment block that is automatically created:
--[[
%% properties
%% autostart
%% globals
--]]
--[[
 Light level monitor
 This scene has been created by and is copyright (c) 2014, Fibaro UK Ltd
 http://www.FibaroUK.co.uk/
 You may use this scene for personal or commercial purposes however
 please respect our intellectual property and leave this comment block intact
 and unmodified.
]]
-- VERSION 1.0
-- change log at bottom of scene
--[[
  This scene uses a global variable to monitor the status of a switch. You must
  create the global variable in panels->variables in order to use this scene.
  By default the global variable should be called 'OfficeLights' but this
  can be changed if this scene is used in a different location and MUST be
  changed if the scene is duplicated for use in different rooms.
]]
-- Change these values to meet your requirements
local setLevel = 300 -- the lux level that should be maintained
local hysteresis = 40 -- the amount of leeway allowed either side of setLevel
                      -- this stops the light pulsing
local luxID = 327 -- the device ID of the light sensor
local lampID = 328 -- the device ID of the dimmer to be controlled
local changeDelay = 100 -- the speed at which the dimmer will change value
                        -- larger = slower
-- Only allow one instance of the current scene to run at a time
if (fibaro:countScenes() > 1) then
  fibaro:abort()
end
-- Keep doing this forever!
while true do
  -- Get the value of the global variable.  1 = on, 0 = off
  local lightsOn = tonumber(fibaro:getGlobalValue('OfficeLights'))
  -- Read the values of the dimmer and light sensor
  local lampValue = tonumber(fibaro:getValue(lampID, 'value')) -- dimmer
  local level = tonumber(fibaro:getValue(luxID, "value")) -- light level
  -- If the light level is lower than what we want then...
  if (level < (setLevel - hysteresis)) then
    fibaro:debug('Lux: ' .. level .. ' (low)   Dimmer value: ' .. lampValue)
    -- Can we get brighter? 99 is the brightest we can go.
    if (lampValue < 99) then
      -- Yes we can!  But if lightsOn = 0  (off) then we'll set the value to 0
      fibaro:call(lampID, 'setValue', (lampValue + 1)*lightsOn)
      fibaro:sleep(changeDelay)
    else
      fibaro:sleep(1000)
    end
  -- If the light level is higher than what we want then...
  elseif (level > (setLevel + hysteresis)) then
    fibaro:debug('Lux: ' .. level .. ' (high)  Dimmer value: ' .. lampValue)
    -- Can we get dimmer? 0 is off - the darkest we can go.
    if (lampValue > 0) then
      -- Yes we can!  But if lightsOn = 0  (off) then we'll set the value to 0
      fibaro:call(lampID, 'setValue', (lampValue - 1)*lightsOn)
      fibaro:sleep(changeDelay)
    else
      fibaro:sleep(1000)
    end
  -- Otherwise the light level must be correct (give of take the leeway)...
  else
    fibaro:debug('Lux: ' .. level .. ' (ok)')
    fibaro:sleep(1000)
  end
end
--[[
Change log
1.0
- Initial release
]]
- Modify the local variables (starting on line 35) so they suit your system. Pay particular attention to luxID and lampID. These should be changed to the device IDs of your light sensor and dimmer devices respectively.
- Click the save button on the right of the page
SO HOW DOES IT WORK?
%% autostart
This causes the scene to start running as soon as the Home Center 2 starts (or the scene is saved).
The following lines allow this scene to run only once at a time (just in case it is manually started):
if (fibaro:countScenes() > 1) then
  fibaro:abort()
end
Once the scene is running, it then starts (on line 50) an infinite loop which causes the remainder of the scene to repeat forever.
The steps in this forever repeating loop are as follows:
Lines 52-55:
Get the values of the global variable, the dimmer and the light sensor
Lines 58, 71 and 84 :
See if the light level is too low, to high or just right. Each of these tests has an associated block of code.
- If it is too low it increases the value of the lamp by 1 (as long as the light is not already fully on)
- If it is too high it decreases the value of the lamp by 1 (as long as the light is not already off)
- If it is ok, it sleeps for a second.
Lines 64 and 77 are the lines that are used to set the value of the dimmer. The new value is multiplied with the value of the global variable. This is going to be either 1 or 0. In this way, if the lights should be off, the value of the dimmer will be set to 0.
Some thoughts
There are several factors which influence the settings of this scene:
- The difference in light level which the light sensor will report (parameter 40 of the motion sensor). The smaller the value, the more precisely the sensor will report, but the quicker the battery will drain.
- The value of setLevel (line 35 of the main scene). This will be different in every location. Watch the scene’s debug output to help you adjust this.
- The value of hysteresis (line 36 of the main scene). This will determine the range of values around setLevel which the scene will consider ‘close enough’. The bigger this value the less prone the light will be to pulsating when the room is at the correct light level. However, if it is too big the light level in the room will jump from one level to another.